Key takeaways
The Pokémon card grading process can turn a raw card into a slab worth 5x its ungraded price — or waste your money if you submit the wrong card. Here is what every collector needs to know before sending anything out.
- 🎯 Self-grading before submission saves real money: submitting a card with edge chips or print lines almost guarantees a grade of 7 or below, which rarely recovers grading fees.
- PSA, CGC and BGS each have different scoring scales and market reputations — choosing the wrong company for your card type directly impacts resale value.
- ✅ Four criteria (centering, corners, edges, surface) determine every grade; understanding each one helps you predict your result before paying.
- PSA 10 population matters more than the grade itself — a low-pop PSA 10 on a vintage card can command a premium of several hundred dollars over a common one.
- ⚠️ Not every card is worth grading: modern bulk rares rarely recover costs, while first-edition holos and sealed promo cards almost always do.
- The single most overlooked factor in the grading pipeline is print defect detection — most collectors miss it at home and pay the price at the grading desk.
How the Pokémon card grading process works from start to finish
The Pokémon card grading process follows a clear sequence. Understanding each step before you submit stops costly mistakes before they happen.
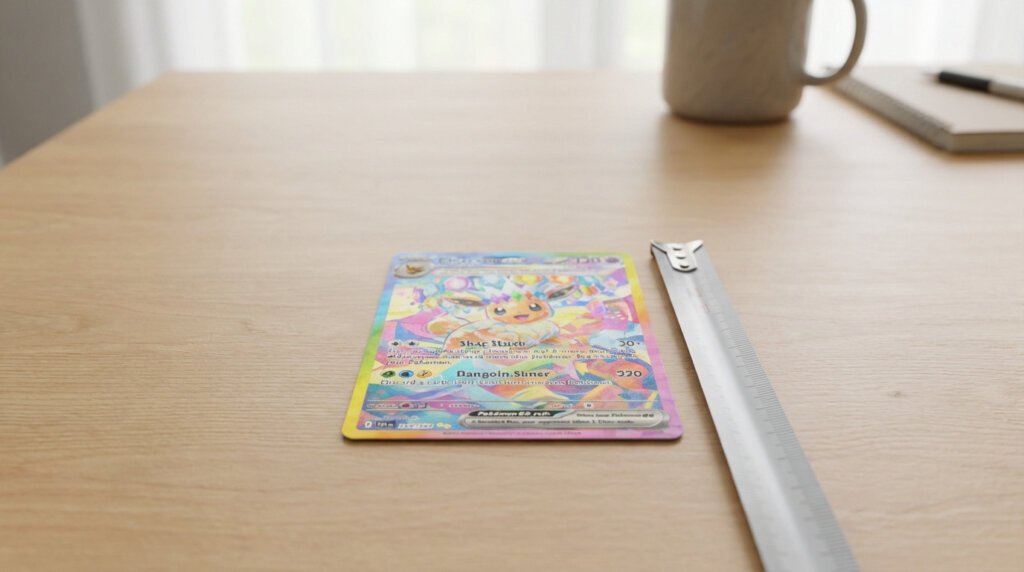
Step 1: Inspect and self-grade your card before submitting
Self-grading is not optional. It is the single step that separates profitable submissions from expensive regrets.
Grab a loupe or a 10x magnifier and check your card under bright, angled light. Look at the four corners individually, run your eyes along every edge, and tilt the card to catch surface scratches invisible under flat lighting.
- ✅ Measure centering front and back — PSA 10 requires roughly 55/45 or better on both axes.
- Corner chips and whitening on edges are automatic grade killers; spot them now, not after paying submission fees.
- ⚠️ Print defects (ink spots, lines, miscuts) are tricky — they can look fine in hand and wreck a grade. See our guide on how to tell a fake Pokémon card for defect detection tips that apply equally to authentic cards.
A realistic self-grade of 7 or below usually means the card will not recover its grading cost. Be honest with yourself at this stage.
Step 2: Choose your grading company, PSA, CGC or BGS
Not all slabs carry equal weight in the resale market. Your choice here directly affects the final dollar value of the card.
PSA remains the dominant name for vintage Pokémon. Its 10-point scale and brand recognition drive the highest secondary market premiums, especially for Base Set holos and first-edition cards. BGS (Beckett) uses half-point increments and a coveted BGS 10 Black Label, which suits collectors chasing ultra-precision on modern full-art cards. CGC is the rising challenger, offering competitive grading prices and faster standard turnaround for budget-conscious collectors.
- 🔥 PSA for vintage and investment-grade cards.
- BGS for modern premium pulls where sub-grades matter.
- CGC for newer sets where you want a slab without PSA’s premium fees.
According to PSA’s official grading service page, graders evaluate every card across multiple quality criteria using their standardized 1-to-10 scale, making consistency the core of their value proposition.
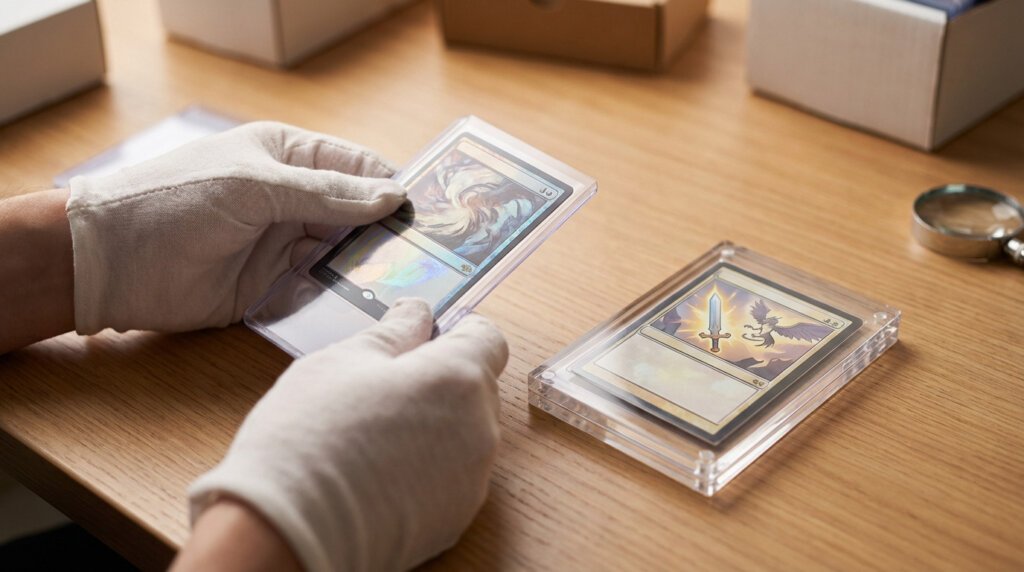
Step 3: Submit your card and track it through the grading pipeline
Submission is a process, not a single click.
- Create an account on your chosen grader’s portal and declare the card’s estimated value accurately — this determines which service tier you qualify for.
- Sleeve the card immediately in a perfect-fit inner sleeve, then a semi-rigid holder. Damage in transit is not covered by most services.
- Ship with tracking and insurance matching the declared value. Losing a first-edition Charizard in transit with no insurance is a nightmare that happens more than collectors admit.
- Monitor progress through the grader’s online order tracker. PSA, BGS, and CGC all offer real-time pipeline stages showing research, grading, and encapsulation status.
Turnaround times vary enormously by tier and company. Check our detailed breakdown of how much it costs to get a card graded to match your budget to the right service tier before you commit.
PSA grading cost, turnaround tiers and what you actually pay in 2026
PSA pricing is more layered than most newcomers expect. The cost you pay depends on two things: how fast you want results and how much your card is declared to be worth. Get either wrong and you either overpay or disqualify yourself from a tier entirely.
Service tiers explained: speed vs. minimum declared value
PSA structures its tiers around declared value per card, not just speed. A card declared at $500 cannot use the cheapest tier, even if you are willing to wait months. This trips up a lot of collectors submitting modern chase cards.
According to PSA’s official grading service page, each service tier carries a maximum declared value cap alongside its fee. Exceeding that cap means you automatically move to the next tier up, with a higher price tag.
Here is a realistic breakdown of what you actually pay in 2026 across PSA’s main tiers:
| Tier | Fee per Card | Max Declared Value | Est. Turnaround | Best For |
|---|---|---|---|---|
| Value | ~$20 | $499 | 60–90 days | Budget modern cards |
| Regular | ~$50 | $999 | 45–60 days | Mid-range pulls |
| Express | ~$150 | $2,499 | 15–20 days | High-value vintage |
| Super Express | ~$300 | $4,999 | 10 days | Investment-grade slabs |
Always cross-check current figures on PSA grading prices for 2026 before submitting, since PSA has adjusted fees multiple times in recent years. Factor in shipping both ways, insurance, and any dealer membership fees. The real all-in cost is typically 20–30% higher than the base tier price.
Is getting a PSA 10 hard, and is a PSA 9 worth grading?
PSA 10s are genuinely rare. 🎯 Based on PSA’s own population reports, most modern Pokémon cards achieve PSA 10 rates somewhere between 30% and 55% depending on the print run and set. Older base set cards can drop well below 10% in gem-mint rates due to print quality of that era.
The PSA 9 question is more nuanced than collectors admit. A PSA 9 on a low-population vintage card can still command serious resale value. But on a modern common with thousands of PSA 10s already in the population report, a 9 often sells for less than the grading fee itself.
| Card Type | PSA 10 Worth It? | PSA 9 Worth It? | Key Reason |
|---|---|---|---|
| Vintage Base Set Charizard | ✅ Yes | 🟡 Partial | Low pop = premium even at 9 |
| Modern alt-art rare (high print run) | ✅ Yes | ❌ No | PSA 10 pool too large at 9 |
| Budget modern holo | 🟡 Partial | ❌ No | Grading cost exceeds value gain |
⚠️ A common mistake is grading every card from a big pull session without checking population reports first. Before you submit, look up the pop report on PSA’s site and read our full Pokémon card grading cost guide to run the numbers on potential return versus upfront spend.
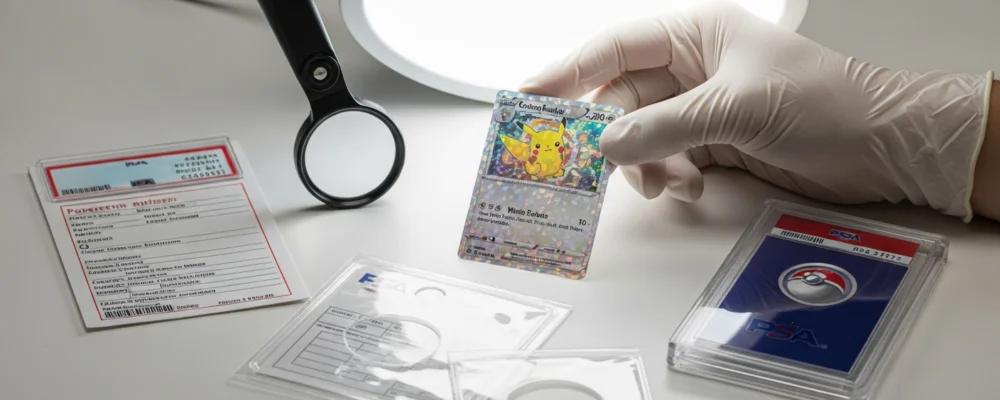
What graders look for: the four criteria that determine your Pokémon card grade
Grading is not guesswork. Every company uses the same four core criteria to score a card, and understanding them is the fastest way to stop wasting money on submissions that will never hit a 10.
Centering, corners, edges and surface: how each flaw costs you points
Each criterion carries weight in the final grade. No single flaw automatically kills a 10, but stacking two or three issues almost always drops you to an 8 or below. Here is how graders evaluate each one.
Centering is measured as a percentage ratio, front and back. PSA generally requires the front to sit within a 55/45 ratio for a PSA 10, and the back is graded separately. Even a visually subtle off-center print can fail this threshold. 💡 Interestingly, the back is often more off-center than the front on modern prints, and many collectors overlook it entirely before submitting.
Corners are examined under magnification. Fraying, whitening, or rolled tips are instant point deductions. Corners are the most common reason a card drops from a PSA 10 to a PSA 9, especially on cards pulled from packs without sleeve protection.
Edges catch nicks and chips along the card border. A single visible nick under a loupe will typically land you in the PSA 8 range. Edge damage is often invisible to the naked eye, which is why a jeweler’s loupe or a dedicated card inspection light is worth owning before you ever submit.
Surface covers scratches on the holo layer, print lines, dimples, and staining. According to CCC Grading’s Pokemon card grading guide, surface defects are the hardest category for collectors to self-assess accurately because light angle changes what you see dramatically.
The table below shows how flaw severity maps to realistic grade outcomes across all four criteria.
| Criterion | Minor Flaw | Moderate Flaw | Severe Flaw | Grade Impact |
|---|---|---|---|---|
| Centering | 56/44 ratio | 65/35 ratio | 70/30+ | 🟡 PSA 9 / ❌ PSA 7 or below |
| Corners | Slight wear tip | Visible whitening | Heavy fraying | 🟡 PSA 9 / ❌ PSA 7 or below |
| Edges | Micro nick | Visible chip | Multiple chips | 🟡 PSA 8 / ❌ PSA 6 or below |
| Surface | Light scratch | Holo scuff | Deep scratch or stain | 🟡 PSA 9 / ❌ PSA 7 or below |
How to spot print defects that tank a card before you even submit
Print defects are a different beast. They come from the factory, not from handling, and no amount of careful storage will fix them.
The most common are print lines (thin streaks across the card surface), ink spots (small dots of excess ink, often visible near the artwork border), and miscuts where the card is not trimmed squarely. ⚠️ A miscut card will fail centering even if the art looks perfectly centered to your eye, because graders measure the physical border width, not the visual impression.
The best way to catch these before submitting is to inspect under a raking light held at a low angle. Tilt the card slowly. Print lines and surface scratches that are invisible under overhead light will jump out immediately.
If you are unsure whether a defect is a print issue or handling damage, our guide on how to tell a fake Pokémon card covers surface inspection techniques that apply directly here. Fake cards often show identical print artifacts, so the same skills transfer.
Self-grading honestly before you submit is the single best habit you can build. It saves on fees and sharpens your eye over time, which is exactly what the full Pokémon card grading process rewards.
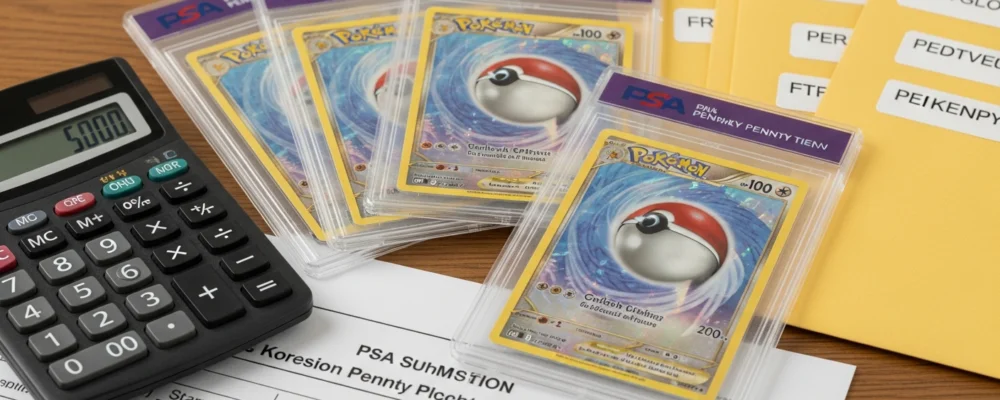
How to decide if the Pokémon card grading process is worth it for your collection
Not every card deserves a slab. This is the most important judgment call in the entire Pokémon card grading process, and getting it wrong is an expensive mistake I see collectors make constantly.
Before you submit anything, run a simple break-even check. Add up the grading fee, shipping, insurance, and any resale platform cut. Then ask: does a graded copy of this card sell for enough above raw price to cover those costs and leave a real profit?
If the answer is no, skip it. Full stop.
Cards that gain real value from a slab vs. cards you should skip
Grading adds the most value to vintage, high-demand, or scarce cards where condition is the deciding factor for buyers. Think Base Set Charizard, Umbreon VMAX Alternate Art, or any card with a naturally thin PSA 10 population.
Cards worth slabbing typically share these traits:
- ✅ Raw price is already above $80–$100, making fee recovery realistic
- ✅ The graded version commands a meaningful premium over the raw version
- ✅ Buyers in this card’s market actively seek slabs for authenticity
- ❌ Common bulk rare with a $3 raw value: grading fees will never be recovered
- ❌ Modern cards printed in very high volume: PSA 10 pop is often enormous, suppressing premiums
As a rule of thumb, I personally avoid submitting anything with a raw Near Mint value under $50 unless it has a strong collector narrative attached. You can explore exactly what grading fees look like in 2026 to build your own break-even model before committing.
How population reports and low-pop grades affect resale price
Population reports (or “pop reports”) are public databases that show how many copies of a card exist at each grade. PSA, CGC, and BGS all publish them. They are one of the most underused tools in a collector’s arsenal.
A low-pop PSA 10 creates genuine scarcity. When only 12 copies of a card exist at a perfect grade, buyers compete hard for each one, and prices reflect that. 🔥 A high-pop PSA 10 does the opposite: oversupply crushes the premium, sometimes to near-raw levels.
Two practical ways to use pop data:
- Before submitting: if a card already has thousands of PSA 10s, your copy adds to the flood. Reconsider.
- When buying graded: a PSA 9 with a pop of 8 can outsell a PSA 10 with a pop of 600, because rarity at any grade tier drives value.
This last point surprises many collectors. A PSA 9 is not always a consolation prize. On certain vintage cards with notoriously tough grading standards, a 9 is essentially the ceiling most submitters hit, which makes high-grade 9s genuinely desirable. Check current PSA grading prices for 2026 alongside pop data before you decide.
💡 The bottom line: treat grading as a calculated investment, not a ritual. Match the card’s market demand, its raw-to-slabbed price delta, and its population context before committing to the process.
Frequently Asked Questions
How much does it take for a Pokémon card to get graded?
The cost of the Pokémon card grading process varies by service tier. PSA charges anywhere from $25 to $300+ per card depending on turnaround speed and declared value. Budget graders like BGS or CGC offer similar ranges, so always weigh grading fees against your card’s estimated market value.
Why is the PSA 9 so cheap?
PSA 9 cards are significantly more common than PSA 10s, which drives their price down. A single surface scratch or slightly off-center print can drop a card from a 10 to a 9, meaning far more cards reach that grade, increasing supply and reducing collector demand compared to a perfect PSA 10.
Is getting a PSA 10 hard?
Yes, earning a PSA 10 is extremely difficult. Graders evaluate centering, corners, edges, and surface condition under strict standards. Most submitted cards grade at PSA 8 or 9. Vintage cards especially struggle due to age-related wear, making a PSA 10 a rare and highly valuable outcome.
How does Pokémon card grading work?
The Pokémon card grading process involves submitting your card to a professional grading company like PSA or BGS. Experts then inspect four key areas: centering, corners, edges, and surface. The card receives a numeric grade from 1 to 10, gets sealed in a tamper-evident case, and returned to you.